

Before you start
- Install and activate the Webhooks Add-On from Forms, then Add-Ons.
- Work through the privacy checklist for each form.
- Make sure the site’s background tasks run. Gravity Forms sends webhooks from a background request the site makes to itself. If those requests fail, the site sends only on its 5-minute WordPress cron, so a quiet site can deliver hours late. Check Forms, then System Status, for background task warnings.
Add the feed
Add one feed to every form that should create leads.1
Open the form's webhooks
Open the form, then Settings, then Webhooks, then Add New.
2
Name it and set the address
Set Name to
Carescale. Paste the Endpoint address into Request URL exactly as Carescale shows it, starting with https://. Don’t add a trailing slash or a query string.3
Set the method and format
Set Request Method to
POST and Request Format to JSON.4
Add the Authorization header
Under Request Headers, add one row. Choose
Authorization as the name, or add it as a custom key, and set the value to Bearer , followed by the secret.5
Choose the request body
Set Request Body to Select Fields and map the fields as described below. All Fields also works, but it sends field numbers with no labels, so the Carescale admin has to match every field by hand.
6
Save
Leave Webhook Condition off, so every submission is sent, and save the feed.
Map the fields
With Select Fields, each row has a key you type and a form field or entry property. Use the keys below exactly as written: Carescale links each one to its lead field as soon as the form’s first submission arrives, so even that first lead fills in. Any other key is turned into a label, sodate_of_birth reads “Date of birth”, and the Carescale admin confirms its link under Review.
Add these entry properties too, so Carescale can name the form, ignore repeats and place uploads:
With Select Fields, only the insurance card keys are downloaded into the lead. Any other upload arrives as a link that stays on the lead. If the form collects other documents, use the snippet, which downloads every upload field.
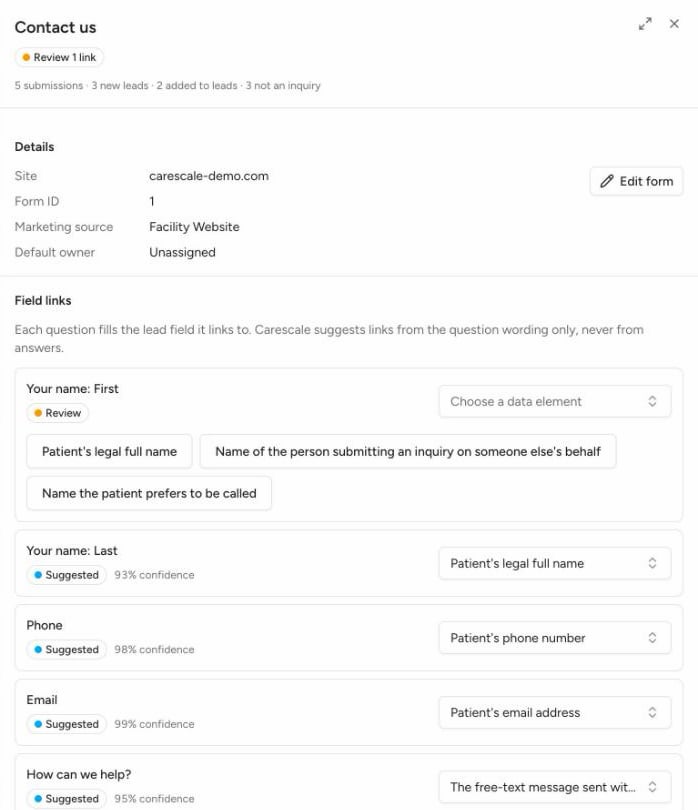
A form's field links in Carescale (sample data)
How Gravity Forms sends
- One attempt, no retries. Gravity Forms sends each entry once. When Carescale refuses a delivery, Gravity Forms still notes it as sent and never tries again. The Carescale card shows the refusal under Last rejected delivery.
- A 5-second limit. Carescale answers within well under a second. A network failure pauses the site’s webhook queue for a few minutes and drops that entry.
- Spam isn’t sent. An entry Gravity Forms flags as spam is never sent. If you later mark it Not Spam, Gravity Forms sends it then, once.
- Late deliveries keep their time. An entry that waited in the queue arrives with its original submission time, and Carescale uses that time on the lead.
Test it
- Submit the form on the live site with made-up details: a 555 phone number and an
example.comemail. - In WordPress, open the entry under Forms, then Entries. Its notes should read “Webhook sent. Response code: 200.”
- In Carescale, the card reads Receiving, the form appears in the forms list, and a new lead is at New.
- Clear the test lead with Not an inquiry.